Quickstart Guide: Create and Publish an Editable Report
Create and publish a report to display objects and attributes.
To create and publish an editable report:
Create the report
- Click
 Report Editor to open the Report Editor.
 - Click
 New to create a new report.
 - Enter a Name and a Description for the report and click OK
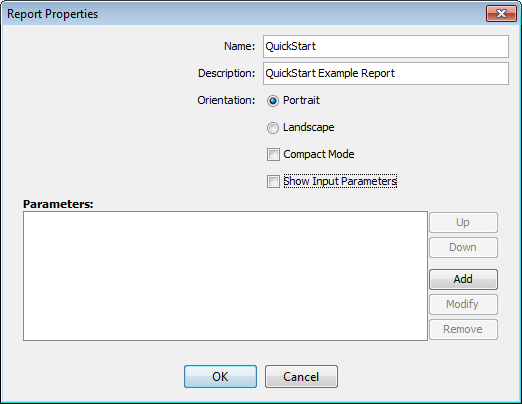
Enter the report details on the Report Properties screen
- Click
 New Paragraph and choose Object Attribute Table.

Choose the body paragraph type
- In the Object Attribute Properties screen, open the Data tab.
- On the Data tab, choose an Object Type for the report.
- In the Attribute Columns section, tick the checkboxes beside each of the attributes that you want to display in the table.
- Click Apply to apply your changes.
- Click Bind Data to bind the data table columns to the report table
- Click OK to save your changes.
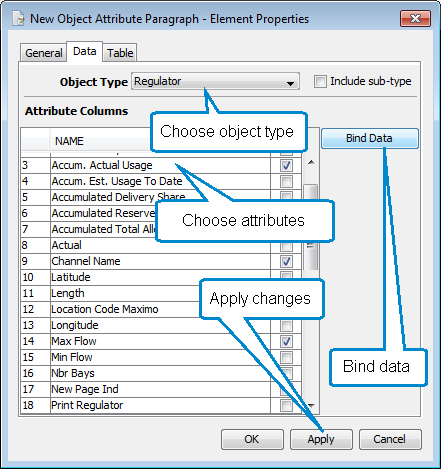
Configure and bind the report data on the Data tab
- Click
 Save to save the report.
Preview the report
- Select a value for the Area/Group parameter and click Update
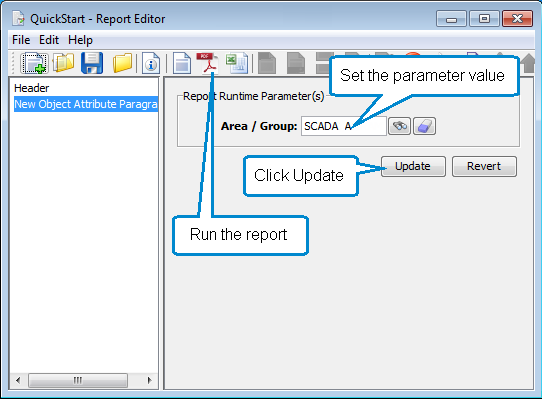
Choose an output type to run the report
- On the Report Editor toolbar, click
 PDF to run the report and create PDF output. When the report is displayed, check that the output is what you expected.
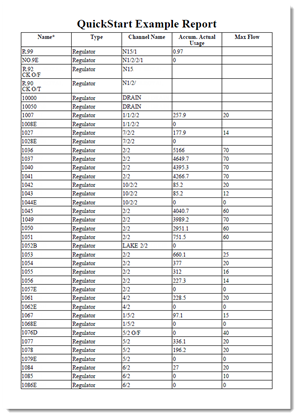
Example of report output
Publish the report
- Choose File > Publish from the menu to open the Publish Report screen.
- Choose a Major Category and a Minor Category for the report. These determine where the report will appear.
- Add an access authority to the form as follows:
- Click
 Add
to open the Insert Authority screen.
Add
to open the Insert Authority screen.
- Select a Role for which this authority will apply.
- Select ALL PARTIES to make the report available to any party logging in with that role.
- Click OK.
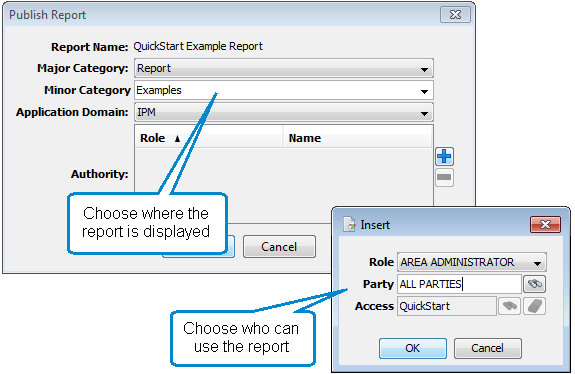
Choose the report location and configure access rights to the report
- Click
- Click OK to save your changes.