Creating a Regulator
About regulators
A regulator is a structure that controls flow in a channel. Regulator objects are link objects that are typically connected to reaches at either or both ends. Depending on your configuration, you may have several subtypes of regulator such as flumes, slip gates and siphons.
Regulators have a direction, that is they have an upstream side and a downstream side. So it is important to place the connections in the correct order.
Determining the orientation of a regulator
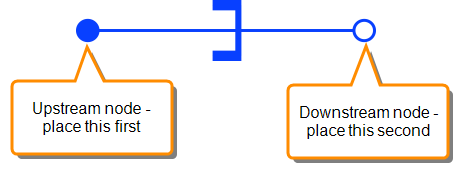
A regulator, or other in-channel object has an upstream node and a downstream node.
- The upstream node is filled
- The downstream node is clear
You can sometimes tell the regulator orientation from the icon image, but this is less reliable than using the nodes.
Placing a regulator
Note
Recommendations:
We recommend that you follow these guidelines when placing a regulator:
- Display the drawing grid and turn on the snapping function. See Using the Grid for details.
- Place the two ends of the regulator no less than 2 grid cells apart.
To place a regulator on the network schematic:
A regulator must be connected on one or both ends to the end of a reach, or to the end of another regulator. Click on an end node when you place either the upstream or downstream end of the regulator to connect the objects. You cannot connect a regulator part way along a reach (as you do for an outlet node).
- In the Network Editor, select the type of regulator to add from the objects palette.
- Click on the canvas to place the upstream side of the regulator.
- Click again to place the downstream side of the regulator.
- In the popup dialog, enter the regulator name (you can leave this blank if you wish) and click OK.
You can now connect a reach or regulator on the unconnected side of the regulator.
Setting the Maximum Flow for a Regulator
If necessary, you can set the maximum flow allowed for a regulator.
To specify maximum flow rate:
- Select the regulator in the Network Editor .
- Right-click and choose Details from the shortcut menu.
- In the Object Details > Attributes tab, select the Max Flow attribute.
- Click Modify and enter the flow in ML per day.
- Click Save to save your changes.